 Well, last weekend I was deciding between doing some grinding on the starboard deck just to smooth things out a bit, or move the staging to the other side of the boat to start working there. I decided to move the staging and call the starboard "good enough" for now. To celebrate, I walked back and forth on the new deck a few times - I even bounced a bit, too.
On the starboard deck, I had tried the shot-filled hammer bit - tapping the deck and listening for the dullish "thud" to indicate a delaminated spot, and except for a couple of spots, was never quite sure if I was hearing correctly. Tim L. suggested a small steel hammer of his forum when someone asked about "sounding", so I thought I'd give it a try.
First on the starboard deck. I tapped across and up and down, and generally got a nice sharp
 "ping" in return on original good deck. My recored deck was not quite so satisfying and a bit duller. I'm really hoping it because the Corecell core is dampenning the sound a bit more than the balsa. Then, I found this spot. A definite dead spot - "thud". I started marking these spots with an "X". This is a seam on the forwardmost part of my starboard sidedeck work. No core was added, it was just sawed, then the seam filled with resin, then glass over. You can see through the original glass where I sanded off the paint, nonskid and gel coat. A definited spot where it looks as though the lower side has debonded. (or was never bonded?) Anyway, I'm thinking I'll take a holesawto it or drill two holes a fill it with epoxy...
Moving right along. The goal was to do my exploration before getting out the circular saw. I did some exploration last time, but was not very confident in my findings and just figured it'd be easier to just start cutting. Bad idea.
With this in mind, I moved to the port sideck and sounded the same way, again marking "X"s where I heard the "thuds". I also did the cabin top and was not pleased at some of my findings there - not surprised either with all the holes up there. Then I got out the drill and started with the "X"ed spots and tried to determine the radius around those bad spots. To my annoyance, many of those spots seemed to have perfectly good core! I reminded myself, debonding does not always mean rotten core.
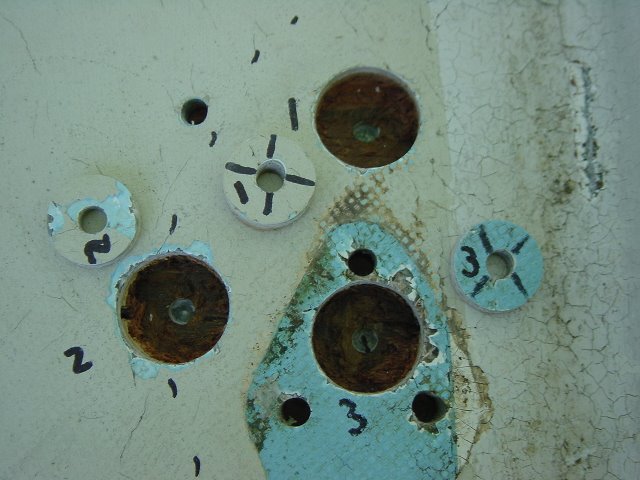
 So, I got out the hole saw. I figured I could see better what was going on, and it'd be easier than recoring. The picture on the left was from around an "eye" thingy where the lifeline terminated on the deck, just before the cockpit . The core had obviously been wet at some point as it was very dark - but still quite solid. It took a little effort to gouge it out. The picture to the right was good core, but definitely debonded. You can see the glass strands on the back of the plug where I'm guessing it had never been adheered. I gouged out as much of
 the balsa core I could, then wetted all these holes with unthickened epoxy, then thicked, then placed the plugs back into the deck.
Finally, I mapped out where I'll be cutting my next session. Hopefully, it'll go a little smoother.
I also added these and more pictures to the September web album.