So, I'm using West System epoxy (availability, reputation, documentation, some would say marketing, etc.) They have this handy "pump system" where the 5:1 ratio of resin and hardener is measured for you - all you have to do is count the number of pumps of resin and hardener. Not so bad. Worked great the first time I tried it. About as idiot-proof as they could make it, really.
Well, after finding the epoxy still tacky last night, four days after finishing the job, I began combing through old emails and rereading the West System User guide, trying to figure out what the heck was going on. Then it hit me. 5:1 ratio. 5:1 ratio. Wait a minute! The pumps... The @#!$# pumps! I had actually done it. I had outsmarted the idiot-proof "pump system".
I don't know, I guess I was really preoccupied with other things, like: Am I doing the scarf joints properly? Should I be using the 17oz biax, or the 8 oz cloth now? Have I washed and ground down the previous layer enough? Can I get this done before dark?
And I kept thinking 5:1 ratio, 5:1 ratio. Don't screw it up. So that's what I did: 5 pumps of resin, 1 pump of hardener. Over and over and over again. I did indeed mismeasure every single batch of epoxy I mixed last weekend. ALL of them. The entire day's worth of epoxy and glass and filler on the starboard side deck. What I did in reality, was mix a whole bunch of 25:1 resin goo.
Needless to say, I'll be learning how to remove and clean up uncured epoxy this weekend...
Thursday, August 31, 2006
Tuesday, August 29, 2006
El Crappola!
The expoxy on the deck is still tacky, three days after "finishing"...
I asked my stupid question on the Classic Plastic forum - Tim L. was kind enough to respond, which is great, because he would be my first choice to ask anyway, but I didn't want to keep pestering him because he's just a little busy building a new house. But, he said if it wasn't dry by, ummm, yesterday, "something may be fishy". But, he didn't realize I was using the slow hardener, so maybe I can revise his estimate by a couple of days? (Not to worry Tim, I have changed my pump back to the 205 fast and smoking hardener.)
But, not to be deterred, because that was not what I wanted to hear, I called West System's tech support. That guy wasn't too worried at all (of course not, he didn't just spend his Saturday grinding and glassing his side deck) and said that with the low temperatures we've been having, it'll take a while to cure. The ambient temperature needs to climb a bit to get things to harden up. The West System manual says 60 degrees ins the minimum for the slow hardener (206) which I used, and the high's have been barely above that for the last three days. Here's hoping he's right. I won't get to it until this weekend anyway, so we'll see.
My friend Scott also sent an email to talk me down - he's no slouch when it comes to epoxy either - he's built his own wood kayak and claims it floats, though I've only seen it in his basement. Thanks Scott.
Besides, as I said before, I've got three, no four "empty" used pots that I used for mixing last weekend that haven't cured yet. I just can't believe that even I could screw up mixing epoxy that many times!
Anyway, it looks like the sun will make a showing and it'll finally get back into the high 70's tomorrow, so I'm trying to be optimistic. Me and the remaining bugs that haven't gotten themselves stuck to the deck are really hoping the stuff hardens.
On another note, Tops in Quality was supposed to ship the stern rail on Monday. I called them and found out they are behind schedule and would need until Friday... Good thing the rail won't be needed until next year -maybe I'll have it by then.
Sunday, August 27, 2006
Oh oh!
Now I'm worried. The epoxy hasn't dried yet! 16 hours and it's still tacky. I kept three of my leftover pots that I mixed them in, and they're not solid yet! I'm really hoping it's a temperature issue. I can't imagine I mismeasured epoxy and hardener 3 times!
I used the slow hardener yesterday - it was cool, didn't hit 70 degrees. Last night got down to 50. Today is overcast and cloudy and it won't get to 70 - and rain is due later today!! I went out with a heat gun, and after a while, thought better of it. Time for some stupid questions on the forum. Dammit.
I used the slow hardener yesterday - it was cool, didn't hit 70 degrees. Last night got down to 50. Today is overcast and cloudy and it won't get to 70 - and rain is due later today!! I went out with a heat gun, and after a while, thought better of it. Time for some stupid questions on the forum. Dammit.
Back to work...
 A nice week off. Back to the figurative grind tomorrow. Sigh.
At the Chebeague Island boatyard, I saw no less than two Ariels on their moorings. I didn't make it over to the boatyard until the last day, what was I thinking? Nonetheless, after a week off, it inspired me to get cracking. My wife was kind enough to take kid duty and let me get back to work on the boat on Saturday.
I started off scrubbing the side deck to get rid of any blush that may have formed on the surface of the epoxy - which I didn't see - which I wouldn't know what it looked like if I did see - so maybe I did see some. In any event, I scrubbed the deck. Nice and solid and hard. Yippee.
 The plan was to wash the deck, grind things a bit to give the new epoxy a good surface to adhere to, and lay down the final layers of fiberglass tape. On closer inspection, I noticed a couple of the seams which I had previously filled with unthickened expoxy, now had air under the fiberglass tape! Can't be good. So I got out the mat knife and sliced away to get at the void, figuringI'd have to do the joint all over again. Then I went over all the epoxied surfaces with my sander and 60 grit. The epoxy sands a lot easier than the original gel coat - after the previous weekends of grinding, it was almost a pleasure. Heh!
When I was done grinding, I filled the seams with thickened epoxy.
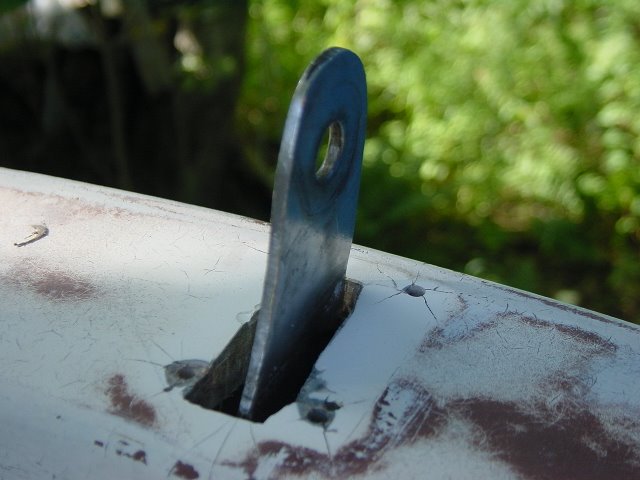
Then I got to looking at the holes where the forward most stanchion base was attached to the deck, right in front of my
 forward most cut. Now why didn't I cut that section out? I know the core is bad there. Oh well. Shouldn't be to hard to fix. I thought I'd try the drill and bent nail bit. I broke the nail. I moved on to an allen wrench, which I broke. Then got a bigger allen wrench. So much wet core kept coming out that I decided to heck with piddling around like this, and got out my 1 inch hole saw drill bit thingy - whatever it's called. This way, I could really get in there a clean everything out, and then fill the holes with epoxy. No big deal since this whole section of deck will be faired, etc. - someday.
 To make this way too long story short, I dug and scraped and gouged, taped the undersides of the holes and filled them. Then mixed more epoxy, laid down 2" tape or 4" tape where needed until my batch ran out, then did it again. I even got out the cloth, the thick mat stuff to fill in low areas where my grinding was at its best. I finished by dark - the whole side deck, everything. Whew!
Friday, August 18, 2006
Vacation Time!
Woo hoo! We're headed out to Chebeague Island for a week of vacation! I don't even know when I last took a real vacation. No work, no house chores, no computer, and (...gulp!) no boat.
I've checked on the deck work numerous times, and it's hardened up real nicely - if not a bit "bumpy", and the deck is nice and firm as it is. But, I suppose I'll need to do some more grinding before the final layers of glass and cloth.
Later.
I've checked on the deck work numerous times, and it's hardened up real nicely - if not a bit "bumpy", and the deck is nice and firm as it is. But, I suppose I'll need to do some more grinding before the final layers of glass and cloth.
Later.
Tuesday, August 15, 2006
Added Picasa Web Album Link
To document last weekend's festivities, what I really needed was an online photo album instead of all this typing stuff...
Tuesday, August 08, 2006
08-07-06: Epoxy and New Deck Core
 In preparation for the recore job, last winter I ordered 6 sheets of CoreCell A500 (B) 9MM PL 23"x48" for $73.14 from Noah's Marine. I'm very pleased with how well the thickness matched the previous balsa core and how easy the stuff is to work with. It's light and kind of "crispy" or brittle. I cut the pieces of CoreCell with a mat knife and dry fit them
 onthe deck (picture on left). It felt good, like I was finally putting things back together rather than endlessly ripping the boat apart.
Next, I went below and taped up any of the holes where expoxy might drip through. To the right is my "prepped" deck, including the hole through the lower skin from my over zealous grinding.
Finally, it was truly the time for epoxy. For the first batch, I figured I'd need a decent amount of thickened epoxy to fill the holes and stuff it in around the edges where I had dug out the exposed balsa core. I needed it thick enough so it would bridge the gaps and stand up along the edges of my cuts. What I hadn't counted on, was how much silica thicker it would take to get there. I bought a bunch of quart size plastic buckets with measurements on the sides. I figured I'd go for about half or a little more in one of these. I poured the resin to the desired mark. Then I poured the hardener, which was a mess and a real pain, from the can. Inspite of all the dripping down the side of the can, I managed to get the right amount into the bucket. I stirred and stirred and went outside by the boat where the silica thickener was located and my thickening station was set up, and started adding. I thought I was real clever by snagging a coffee measuring spoon to dispense it - long handle, nice shape for scooping, etc. I started with three heaping spoonfulls, expecting the epoxy to thicken up, which it didn't. The stuff is a pain to mix into the epoxy, so each addition takes a while. Needless to say, I kept adding and stirring and adding and stirring until it was finally thick enough to apply. I climbed up to the boat, which was in full sunlight now, and got to work.
 No sooner had I begun that the bucket started getting warm, really warm. Hmm, I thought, it must be getting ready to "kick", impressed with myself and my newfound epoxy lingo. "Curious", I thought, as smoke start wisping out of the mixture, which quickly became too hot to hold. Then I thought, "Damn! Now this is hot!" - by the way, latex gloves are not good insulation against heat. So I placed the smoking bucket on the deck since I couldn't hold it any longer and figured I'd really better hurry up. I grabbed my stir stick/spreader which was in the bucket, and the whole pot came with it. The epoxy had already started setting and was unusable, and the stir stick was stuck fast. So I carried my smoking bucket by its stir stick handle to a bare patch of dirt and nonchalantly wandered inside where I could watch in case the mess exploded. The first batch is the one on the left.
Take 2 - a smaller batch. More precise measurements were needed, and this time the hardener was an absolute mess, with more running down the side of the can than was going into my next bucket. I thickend what I had, patched a hole, stuffed what was left along the edges, then went to Hammilton's Marine to get a pump kit. My route there takes me across the Casco Bay bridge and the day was absolutely gorgeous. Sailboats were out - everywhere - in Casco Bay. And my clever expoxy lingo was long forgotten.
 The rest of the day, however, did get much better. I got better with each successive batch as can be seen in the picture above. I found much better success with smaller batches, though it is a pain to be constantly mixing the epoxy. I thickened a batch and filled the edges (picture on left). Then I made another and "wet out" the lower skin with unthickened epoxy, and placed three fiberglass cloth patches over the bad spots, then added more expoxy on top of those and pressed them down. I used a cheapo paint brush to spread the unthickened epoxy which worked pretty well. Then I thickened another batch and smeared it on the underside of the CoreCell and place the pieces on the deck. Then, I wet out the bottoms of the deck pieces, thickend it and smeared epoxy over the CoreCell, then set the deck skins on top. Yadda yadda yadda.
I capped off the day by placing wax paper over the deck and laid some boards across that to distribute the weight more evenly. Bricks and milk jugs filled with water were placed on top of that, at which time I wiped up what epoxy squeezed out the seams, then covered it all with the tarp.
Real progress at last!
08-06-06: Grinding and Rear Chainplate
This weekend was decent weather, and my wife was kind enough to man the kids, so it was time to really get sometihing done. Here are Saturday's highlights:
More grinding to make sure the surfaces were really ready for epoxying. On one of the pieces which I had cracked while prying it off, I ground right through it while I was trying to grind it smooth. Oh well, I got out the jig saw and cut a semi circle around the area. I'll fill and fair it later. This is from the next day, Sunday when I was cutting the corecell pieces for the deck. You can see the notch on the left and the core cell underneath the deck pieces.
Next, this happened. Here are the links, because I'm way too lazy to write it again: Deck Hole 1, and Deck Hole 2
I shot off a panicked email to Tim, and in his usual fasion, he talked me down and explained what the stuff was/is: "That gunk is some of the polyester resin that Pearson used for bonding the liner in place". His email was much more informative and verbose, but that's the gist. The mat underneath the old resin in the pictures is the backside of the cabin headliner. He suggested that I not obsess over it, fill it with thickened epoxy, then patch it with a layer of fiberglass cloth before I install the new core - which I did. For what it's worth, I'm astonished that he is willing to take the time (again and again, I might add!) to respond, encourage, and explain so many questions I've asked him. And I'm all the more grateful to him as he is in the midst of building his own house! So, "Thanks Tim!". You are very much appreciated!
Rear chainplate:
 After the incident above, while I was waiting to hear how I'd screwed up, I was generally
 pretty discouraged after grinding again all morning long, so I thought I'd do something different. I got out the dremmel and a file and enlarged the rear chainplate opening on the taff rail and dry fit the new chainplate. Here's the old one on the left...
and the new one on the right.
Oops! I was late for dinner with the in-laws and the family. End of Saturday.
 to really get sometihing done. Here are Saturday's highlights:
More grinding to make sure the surfaces were really ready for epoxying. On one of the pieces which I had cracked while prying it off, I ground right through it while I was trying to grind it smooth. Oh well, I got out the jig saw and cut a semi circle around the area. I'll fill and fair it later. This is from the next day, Sunday when I was cutting the corecell pieces for the deck. You can see the notch on the left and the core cell underneath the deck pieces.
Next, this happened. Here are the links, because I'm way too lazy to write it again: Deck Hole 1, and Deck Hole 2
I shot off a panicked email to Tim, and in his usual fasion, he talked me down and explained what the stuff was/is: "That gunk is some of the polyester resin that Pearson used for bonding the liner in place". His email was much more informative and verbose, but that's the gist. The mat underneath the old resin in the pictures is the backside of the cabin headliner. He suggested that I not obsess over it, fill it with thickened epoxy, then patch it with a layer of fiberglass cloth before I install the new core - which I did. For what it's worth, I'm astonished that he is willing to take the time (again and again, I might add!) to respond, encourage, and explain so many questions I've asked him. And I'm all the more grateful to him as he is in the midst of building his own house! So, "Thanks Tim!". You are very much appreciated!
Rear chainplate:
 After the incident above, while I was waiting to hear how I'd screwed up, I was generally
 pretty discouraged after grinding again all morning long, so I thought I'd do something different. I got out the dremmel and a file and enlarged the rear chainplate opening on the taff rail and dry fit the new chainplate. Here's the old one on the left...
and the new one on the right.
Oops! I was late for dinner with the in-laws and the family. End of Saturday.
Friday, August 04, 2006
Stern Rail Confirmation
Well, by Thursday I had not received the Fax confirming the stern rail order on Monday, so I called Tops In Quality. He apologetically said he'd check into it, and by lunchtime I had a Fax confirmation in my hands. Due date for the stern rail on the Fax says 08-28-06, four weeks after I was finally able to place my order. We'll see.
Weather report looks good for this weekend. We'll see how much I can get done. After some stupid questions on the forum and pointers from Tim, I'm thinking I really need to do some more grinding on my panels and the inner skin of the deck. Once again, I think I went about it a bit too gingerly... Live and learn.
Weather report looks good for this weekend. We'll see how much I can get done. After some stupid questions on the forum and pointers from Tim, I'm thinking I really need to do some more grinding on my panels and the inner skin of the deck. Once again, I think I went about it a bit too gingerly... Live and learn.
Tuesday, August 01, 2006
Stern Rail ordered: 07-31-06
It's "official". I sent another email Monday pesterng them, and I got got a phone call from Tops in Quality late in the morning while I was looking up another stainless fabricator. A nice fellow on the other end, but not the one who was on vacation last week - and this week too, evidently. I could use one. Anyway, he asked a couple of questions about my measurements (for the stern rail, that is), which I answered, then he took my credit card number and said he'd send me a fax of the order. I should have done the phone thing in the first place. (Still haven't recieved that fax yet.) I'm cautiously optimistic that this stern rail order will actually happen...
Other than that, more hot humid weather on the way, right after the thunderstorms roll through. After covering the boat - again, I'm really thinking hard about getting a "real" temporary shelter. The reality is, I won't be getting the boat back in the water this season (sigh), and it'd be really nice to be able to just scurry under the canopy and get to work rather than this infernal covering and uncovering the boat.
Other than that, more hot humid weather on the way, right after the thunderstorms roll through. After covering the boat - again, I'm really thinking hard about getting a "real" temporary shelter. The reality is, I won't be getting the boat back in the water this season (sigh), and it'd be really nice to be able to just scurry under the canopy and get to work rather than this infernal covering and uncovering the boat.
Subscribe to:
Posts (Atom)