Thursday, April 26, 2007

A Trip North

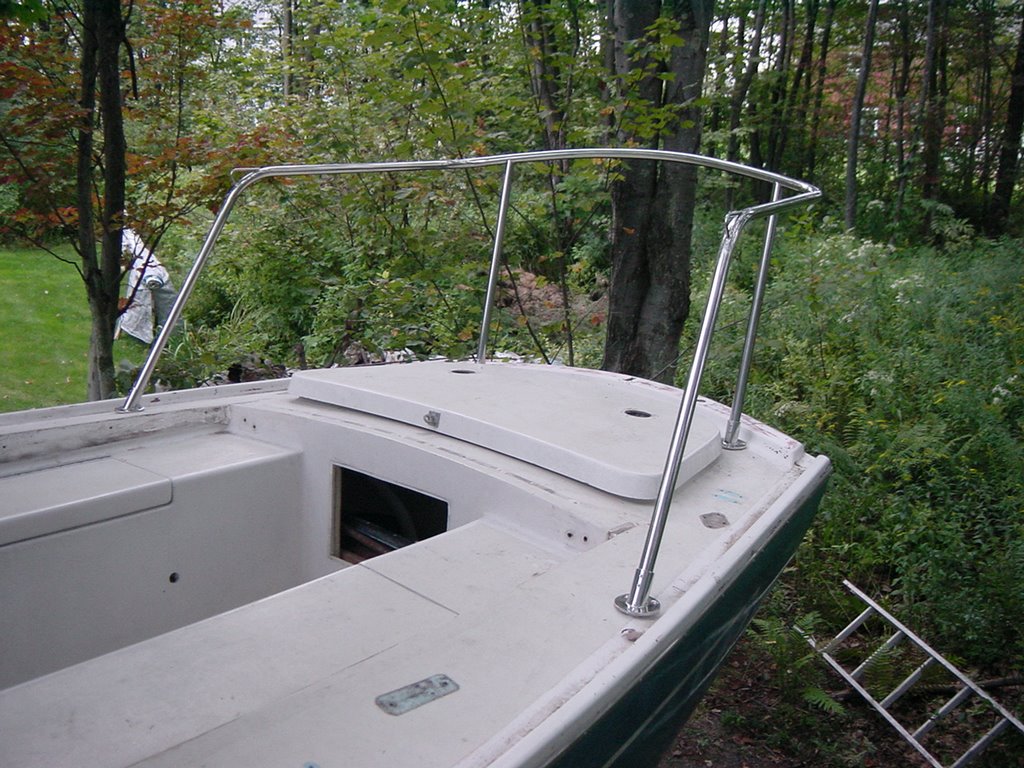
Well, the boat hauler, Steve Morse of Morse Overland Marine, arrived on the morning of April 25 and whisked her up to Tim's shop. I prepped the boat as much as I could. I stripped the rub rails and removed the portlights to save time any time I could. Then I loaded up the hardware and some supplies that he could use, like leftover epoxy and the like and stowed them below. Fortunately, we had a decent little weather window for the haul. However, rain is forecast throughout the weekend.

It sure is nice knowing that Sea Glass is sitting comfortably inside Tim's shop with work moving ahead regardless of the weather. Well, I don't know about "comfortable" from her perspective. I suppose having your decks drilled, sawed and ground is like a bad visit to the dentist for a boat. But, at least she's dry and being readied for an early June launch - a much different feeling than a year ago. This year, I can just check Tim's website and see that the deck work is getting done on the boat, getting done right, and getting done fast. Pretty cool.

Heh. I got an email today from my friend Scott. He helped me out many a day last Summer. Anyway, I had emailed him Tim's link for the Sea Glass project. This was his reply:
holy hell! he's done half of our summer's work in 8 hours...

-scott
Enough said.

So, here are a series of pictures of the haul. It was all new to me a few years back when I moved up here and got my first boat. It's a pretty neat process that happens twice a year, unless you store the boat at yard.

The trailer can be raised and lowered hydraulically. It's also got a support running between each set of wheels that can be removed so the keel and blocks on the ground fit between the wheels. After it is backed in position, the pads, also hydraulic, are adjusted so they until they fully support the boat. Then the jack stands are removed. The support is replaced between the trailer wheels and locked in place. Then the trailer is raised and the boat strapped down.


And there she goes! So, Tim has already been updating his site with his daily progress. In the meantime, I have many things to get ordered and much to be done before launch day...

(BTW, I have no idea what happened with the placement of these pictures. I'll try an fix it when I get a chance. Google has done a great job on this Blog thing, but the handling of images can use some help - or I can...)

Tuesday, April 24, 2007

A New Year...

Well, the winter wasn't too horrible, but decided to make a statement on its way out. Actually, it was Spring that made the statement. This is a picture of the house on April 5, 2007. The boat is under the green tarp to the right. We had two Spring snow storms, and a brutal Nor'Easter that hammered us for a few days around the 16th of April.

With the boating season around the corner, and already pressed for time with basketball games, opening day at Fenway, and birthday parties, I just couldn't see spending another Summer on the recore. In any event, anfter talking it over with my very sweet and understanding wife, we came to a decision. Long story short - it's Tim Lackey to the rescue. He was able to fit me into his schedule this Spring and said he could complete the rest of the deck job and get me launched within the budget I gave him. In fact, tomorrow the boat will be hauled to his shop in Whitefield, and the reconstruction will begin in earnest.

I'm fortunate enough that, at this point in time, we are able to squeak this luxury in. I am totally psyched about seeing the decks after Tim has worked his magic, and even more so at the prospect of going sailing again with the family this Summer!

Other goings on:

The boat has a new name. I finally threw one out there that everyone liked, so hopefully she is on her way to becoming part of the family. Oh, it's Sea Glass. We took a great vacation last Summer out to Chebeague Island, and combing the beach there for sea glass was just about our favorite thing to do. We got loads of it!

April 1: Upon uncovering the boat to clean it up for Tim, who was coming out to do a pre-haul inspection, I was greeted with an absolute mess down below. A squirrel had taken up residence in the v-berth, thoroughly trashed things, chewed a few access panels and other wood throughout, and to top it off, had babies - four of them. We delivered them to a local animal rescue guy who took them in. I named them O-Ring, Gasket, Filter and Impeller for obvious reasons. The boat name was almost changed to Squirrel.

Boat work: I got the lead pig out of the bilge, the portlights removed, the rub rail, everything to try and use Tim's time better. I could go on, but speaking of using time, I really need to get things together for tomorrow's haul. Way too much to do and too little time...

I'll add the link to Tim's site to the right. He'll log the progress better than I ever could.

Wednesday, October 11, 2006

End of Season Retrospective

So there it is. One summer. Gone. Looking at this picture, it sure doesn't seem like much was accomplished, but that is simply not true. The original goal was to get the decks recored, faired and painted and the boat splashed by August . (Swing and a miss!) At least the side decks are recored and the recore learning curve is mostly behind me. All that's left for this season is to button the boat up for the winter and sneak in mini projects on the nice days until the cold weather is here to stay. I'm thinking I'll at leat set up some sort of workshop in the basement and attempt some varnshing over the winter. Discouraging? Yes. Feeling somewhat accomplished? Yes. I learned a lot.

Some observations/tips in no partcualr order:
1. Time. Tim L. said it, people on the forums said it, I now beleive it. It takes lots and it is a huge commitment. In hindsight, I would have gladly bitten the bullet and paid $$ to have it done whe I had the chance, and then enjoyed my Summer sailing with the family. On the flip side, when it's done, I'll be very proud of my little boat and apprecaite every moment that I'm out sailing with the family all the more.
2. Shelter. DO NOT think you can do it with simply a tarp - or at least resign yourself to the fact that you will spend a ton of invaluable project time covering and recovering and trying to figure out how to better cover and recover the boat. Even a canopy over the boat would be worlds better than my setup.
3. Staging. Good move. Spend the time up front, do it and save your back.
4. The 7535 Porter Cable sander has been great. Although at times (like when I was grinding through the POs deck paint, the original non-skid and the original gel coat) I wanted more bang for the buck. I used 60 grit sanding disks. I think I'll try out some 40 grit for the next go-round. Also, I'm wondering if a genuine "grinder" might be a good investment. I'd also consider a sander with a vacuum attachment. Never used one, but grinding sucks - anything to make it less annoying.
5. Dive in and just do it. Get what you think you need and just do it. It's not rocket science. Only I, and maybe a few others, could screw up mixing the epoxy. Even so, worst case, it can be undone and redone. For me, doing the best way to learn. You even learn when you screw up!

I am far from done.

Thursday, October 05, 2006

Port Side Deck recored...

Well, yesterday evening after work, I started glassing the port side deck, and Scott came to my aid a little later. It sure is nice to have a helping hand. He is much appreciated.

By 6:30, I already had to go dig out the plug-in shop light and hang it over the boat so we could see. The sun is setting by 6:15 these days and the temperatures are beginning to plummet at night, so I'm thinking it is the end of deck work for the season. We finished by 7:30, shortly before the rain started.

Hopefully, I'll be able to tackle some other jobs over the Winter in the basement, and get back to the decks first thing in the Spring. I think I'd kill for indoor storage...

Monday, October 02, 2006

And September is done...

That was a quick month! Wow!

Updates: A new October Web Album added to the right. It probably won't see to much action.I'll shut down the recore after the port side deck it glassed over. On nice days with nothing else to do - heh, I have a myriad of other projects I can do in the meantime.

Port side deck recore: the core is replaced, skins are glued, and the (gasp) grinding is done. All that remains is to lay the fiberglass and complete the scarf joints. I'm going to try and procure Scott's services for this. It's much faster and more enjoyable with a helping hand around. I'll be sure and stock up on beer to pay him.

One note on the coamings. Saturday was really nice and sunny. I laid the coaming in the sunshine on the driveway for the afternoon to warm it up a bit. Then, before I mixed the epoxy, I gave the squirt of resin a good blast with the heat gun to thin it a bit. Then, I mixed in the hardener and dribbled it into the holes I had drilled along the bottom edge. It seems to be coming out really nicely. It'll be nice to get to the varnishing stage.

Wednesday, September 27, 2006

Rotted Coaming: Part 2

My garage. I can't wait to put all this stuff back on the boat!

The Port side deck has been recored and epoxied. I need to grind down the seams and do the scarf joints. At this point, I'm hoping I can at least get that done before battenning things down for the winter.

Time is at a premium. With school starting for my son, soccer on the weekends, shorter days and Fall chores - it's tough to find time for the boat.

I've yet to take any pics of that work, but I did do some tinkering with the rotted coaming. I treated for the rot it as previously noted. After some reading, I found that "Git Rot" or whatever it's called, is basically thinned epoxy. You drill into the rotted section, then inject the mixture in. I read in the West System Manual, that thinning epoxy compromises some of its strength and adhesive qualities, and they suggested warming the surface before applying epoxy so it'll draw it in when it cools.

Since the rotted area on the coaming won't be visible when I remount it, I decided to try an experiment of sorts. I drilled holes throughout the punky rotted section in the top and sides being careful not to go all the way through so the visible portion would remain unaltered. Then I applied heat with the heat gun and heated a squirt of resin as well to thin it. Then I added the hardener and filled the holes. After it dries, I'll do this on the sides and end and well to try and get the epoxy throughout the insides.

After all is said and done, I'll coat the whole works with the special clear epoxy (209 methinks) then finish off with varnish. We'll see.

Sunday, September 17, 2006

Progress

Saturday: Grinding. I hate grinding.
Sunday: New core was cut and glued between the cutout panels and the lower deck skin. Lots of epoxy was mixed - properly.

I didn't even take pictures, not very exciting, really. It would have been a really nice day to sail though.

Friday, September 15, 2006

The beat goes on...

It turns out, Thursday I had a couple of hours to work on the boat. Satisfied with the fit of the stern rail, I went about getting the beautiful thing out of harms way for the fall and winter. I attached it to the garage ceiling rafters.

Next, I went to work on the boat. The previous weekend, I had tried to identify where the trouble spots were on the port sidedeck, and used a sharpie to mark where I thought I should cut. Without further ado, I peeled up the tarped, plugged in the extension cord, and got the saw. I cut on the dotted lines where I could get to with the circular saw, then finished up with the dremel.

Without the initial timidity I had on the starboard sidedeck, it went much faster. After the cuts, I got the tools I used previously for prying up the deck skins, and went at it. I was pretty satisfied with the results. Most of the skin sections I cut weren't too bad at all to remove. There are a couple of spots where I may need to cut more, however. I'll have to dig around and see how far back under the skin the wet/bad core goes in those spots...

So, after the panels were removed, I chisled the remaining core material off the undersides of the skins and the lower layer of the deck. Done!

This weekend, the weather looks good and I hoping to grind everything down and at least get the new core glued in place. We'll see. I added more pics of the carnage to the September album to the right.

Wednesday, September 13, 2006

A Preview of the Stern Rail

I'm sure that this is exciting to exactly nobody but me, but I just had to go out and test fit the stern rail today after work.


The boat is quite bare without the coamings and hardware, but I am very pleased with the way it came out. In fact, I'm wishing I'd gone with the welded bases because it fits so well. It'll still be nice to be able to adjust them as I'm installing the rail though.

I think I'll even add the other pictures to the album...

Tuesday, September 12, 2006

Stern Rail arrives: 09-12-06

Well, it arrived on Monday and has been sitting in my office. It's been very hard to concentrate at work, too. I went and picked it up tonight just so I could have it here at home and test fit it ASAP.

For all the bitching (and justified, I might add), Tops In Quality nonetheless came through and did a really nice job. I sent them pictures of Sirocco, a beautifully restored Ariel on the forum, which I thought had an exceptional stern rail. It wasn't just square and boxy tubing like so many I've seen, but it had a nice curve to it that accented the transom and taff rail quite nicely.

I can't wait to see how it fits. The picture just doesn't do it justice.

Mmmmm, soooooo shiny!

Monday, September 11, 2006

A New Look

Well, last weekend I was deciding between doing some grinding on the starboard deck just to smooth things out a bit, or move the staging to the other side of the boat to start working there. I decided to move the staging and call the starboard "good enough" for now. To celebrate, I walked back and forth on the new deck a few times - I even bounced a bit, too.

On the starboard deck, I had tried the shot-filled hammer bit - tapping the deck and listening for the dullish "thud" to indicate a delaminated spot, and except for a couple of spots, was never quite sure if I was hearing correctly. Tim L. suggested a small steel hammer of his forum when someone asked about "sounding", so I thought I'd give it a try.

First on the starboard deck. I tapped across and up and down, and generally got a nice sharp "ping" in return on original good deck. My recored deck was not quite so satisfying and a bit duller. I'm really hoping it because the Corecell core is dampenning the sound a bit more than the balsa. Then, I found this spot. A definite dead spot - "thud". I started marking these spots with an "X". This is a seam on the forwardmost part of my starboard sidedeck work. No core was added, it was just sawed, then the seam filled with resin, then glass over. You can see through the original glass where I sanded off the paint, nonskid and gel coat. A definited spot where it looks as though the lower side has debonded. (or was never bonded?) Anyway, I'm thinking I'll take a holesawto it or drill two holes a fill it with epoxy...

Moving right along. The goal was to do my exploration before getting out the circular saw. I did some exploration last time, but was not very confident in my findings and just figured it'd be easier to just start cutting. Bad idea.

With this in mind, I moved to the port sideck and sounded the same way, again marking "X"s where I heard the "thuds". I also did the cabin top and was not pleased at some of my findings there - not surprised either with all the holes up there. Then I got out the drill and started with the "X"ed spots and tried to determine the radius around those bad spots. To my annoyance, many of those spots seemed to have perfectly good core! I reminded myself, debonding does not always mean rotten core.

So, I got out the hole saw. I figured I could see better what was going on, and it'd be easier than recoring. The picture on the left was from around an "eye" thingy where the lifeline terminated on the deck, just before the cockpit . The core had obviously been wet at some point as it was very dark - but still quite solid. It took a little effort to gouge it out. The picture to the right was good core, but definitely debonded. You can see the glass strands on the back of the plug where I'm guessing it had never been adheered. I gouged out as much of the balsa core I could, then wetted all these holes with unthickened epoxy, then thicked, then placed the plugs back into the deck.

Finally, I mapped out where I'll be cutting my next session. Hopefully, it'll go a little smoother.

I also added these and more pictures to the September web album.

Monday, September 04, 2006

Side Deck Recored and reGlassed

It was a good day today. With the major cleanup done, all that stood between me and finishing up the glassing of the side deck were a few simple chores. I detarped the boat, scrubbed amine blush off the few spots that I had glassed yesterday with water and a brush. Then got out the sander and with and 80 grit disk and smoothed out the rough spots and gave the entire deck a going over just to make absolutely sure there was no unground surface left.

I had exchanged emails with Tim earlier in the week, confessed my stupidity, and checked on the proper method of doing the scarf joints. Armed with this knowledge, I was ready to tackle the job once and for all. At the last minute, I called my friend Scott who graciously came over to lend a hand. He arrived just as I was finishing the grinding. I vacuumed up the dust, then we wiped the deck down with acetone. Time for the scarf joints.

I wanted to get at least one layer of biax on each of the seams where I had cut out a panel and recored. A few of them got two. Then we laid the 8 oz cloth over the top of each seam, except the aft most cuts where the first layer was still intact and hadn't been ground all the way back down. The biax can be seen under the layer of cloth in the picture to the right - its the cloudy looking stuff on the seams where you can see the Corecell underneath.

We traded off mixing epoxy, wetting out the deck, cutting and laying the biax or tape, the rolling out the glass. In a few short hours, we completed what it took me almost and entire day to botch up earlier. It's amazing how much another set of hands helps. All boatwork should go so well.

Sunday, September 03, 2006

Two Steps Backward, One Step Forward

As a sort of penance for my stupidity, on Saturday morning, I decided to regrind everything just to make sure it was ready for round two of the scarf joints. With the remnants of Earnesto blowing in, however, the day was shortened, but I did manage get everything cleaned back up and reground, and also filled the forward stanchion holes I drilled out with biax and expoxy. This time the batches hardened in no time like they were supposed to. I switched the pump to the fast hardener as well.

I added the pictures to a new "September" web album - not much new to look at yet, so I tried a different perspective...

Friday, September 01, 2006

Goo Removed

All I can say is, if you're going to screw up mixing epoxy, do it well. With the 25:1 ratio of goo, the fiberglass cloth strips and biax peeled right off. Then I scraped as much of the rest off as I could. Then bathed everything in acetone. Back to two weeks ago now. Oh well, live and learn, right?

The only thing concerning me is the three 1 inch holes I cleaned out and filled with the bad stuff. I got as much as I could out and sloshed some acetone around in there, but it will be impossible to get it all out. I'm thinking about a mini-recore of the area to really make sure it's cleaned out.

Tomorrow, knock on wood, I should finish up glassing the starboard side deck - again...

Thursday, August 31, 2006

shit Shit SHIT!

So, I'm using West System epoxy (availability, reputation, documentation, some would say marketing, etc.) They have this handy "pump system" where the 5:1 ratio of resin and hardener is measured for you - all you have to do is count the number of pumps of resin and hardener. Not so bad. Worked great the first time I tried it. About as idiot-proof as they could make it, really.

Well, after finding the epoxy still tacky last night, four days after finishing the job, I began combing through old emails and rereading the West System User guide, trying to figure out what the heck was going on. Then it hit me. 5:1 ratio. 5:1 ratio. Wait a minute! The pumps... The @#!$# pumps! I had actually done it. I had outsmarted the idiot-proof "pump system".

I don't know, I guess I was really preoccupied with other things, like: Am I doing the scarf joints properly? Should I be using the 17oz biax, or the 8 oz cloth now? Have I washed and ground down the previous layer enough? Can I get this done before dark?

And I kept thinking 5:1 ratio, 5:1 ratio. Don't screw it up. So that's what I did: 5 pumps of resin, 1 pump of hardener. Over and over and over again. I did indeed mismeasure every single batch of epoxy I mixed last weekend. ALL of them. The entire day's worth of epoxy and glass and filler on the starboard side deck. What I did in reality, was mix a whole bunch of 25:1 resin goo.

Needless to say, I'll be learning how to remove and clean up uncured epoxy this weekend...

Tuesday, August 29, 2006

El Crappola!

The expoxy on the deck is still tacky, three days after "finishing"...

I asked my stupid question on the Classic Plastic forum - Tim L. was kind enough to respond, which is great, because he would be my first choice to ask anyway, but I didn't want to keep pestering him because he's just a little busy building a new house. But, he said if it wasn't dry by, ummm, yesterday, "something may be fishy". But, he didn't realize I was using the slow hardener, so maybe I can revise his estimate by a couple of days? (Not to worry Tim, I have changed my pump back to the 205 fast and smoking hardener.)

But, not to be deterred, because that was not what I wanted to hear, I called West System's tech support. That guy wasn't too worried at all (of course not, he didn't just spend his Saturday grinding and glassing his side deck) and said that with the low temperatures we've been having, it'll take a while to cure. The ambient temperature needs to climb a bit to get things to harden up. The West System manual says 60 degrees ins the minimum for the slow hardener (206) which I used, and the high's have been barely above that for the last three days. Here's hoping he's right. I won't get to it until this weekend anyway, so we'll see.

My friend Scott also sent an email to talk me down - he's no slouch when it comes to epoxy either - he's built his own wood kayak and claims it floats, though I've only seen it in his basement. Thanks Scott.

Besides, as I said before, I've got three, no four "empty" used pots that I used for mixing last weekend that haven't cured yet. I just can't believe that even I could screw up mixing epoxy that many times!

Anyway, it looks like the sun will make a showing and it'll finally get back into the high 70's tomorrow, so I'm trying to be optimistic. Me and the remaining bugs that haven't gotten themselves stuck to the deck are really hoping the stuff hardens.

On another note, Tops in Quality was supposed to ship the stern rail on Monday. I called them and found out they are behind schedule and would need until Friday... Good thing the rail won't be needed until next year -maybe I'll have it by then.

Sunday, August 27, 2006

Oh oh!

Now I'm worried. The epoxy hasn't dried yet! 16 hours and it's still tacky. I kept three of my leftover pots that I mixed them in, and they're not solid yet! I'm really hoping it's a temperature issue. I can't imagine I mismeasured epoxy and hardener 3 times!

I used the slow hardener yesterday - it was cool, didn't hit 70 degrees. Last night got down to 50. Today is overcast and cloudy and it won't get to 70 - and rain is due later today!! I went out with a heat gun, and after a while, thought better of it. Time for some stupid questions on the forum. Dammit.

Back to work...

A nice week off. Back to the figurative grind tomorrow. Sigh.

At the Chebeague Island boatyard, I saw no less than two Ariels on their moorings. I didn't make it over to the boatyard until the last day, what was I thinking? Nonetheless, after a week off, it inspired me to get cracking. My wife was kind enough to take kid duty and let me get back to work on the boat on Saturday.

I started off scrubbing the side deck to get rid of any blush that may have formed on the surface of the epoxy - which I didn't see - which I wouldn't know what it looked like if I did see - so maybe I did see some. In any event, I scrubbed the deck. Nice and solid and hard. Yippee.

The plan was to wash the deck, grind things a bit to give the new epoxy a good surface to adhere to, and lay down the final layers of fiberglass tape. On closer inspection, I noticed a couple of the seams which I had previously filled with unthickened expoxy, now had air under the fiberglass tape! Can't be good. So I got out the mat knife and sliced away to get at the void, figuringI'd have to do the joint all over again. Then I went over all the epoxied surfaces with my sander and 60 grit. The epoxy sands a lot easier than the original gel coat - after the previous weekends of grinding, it was almost a pleasure. Heh!

When I was done grinding, I filled the seams with thickened epoxy.

Then I got to looking at the holes where the forward most stanchion base was attached to the deck, right in front of my forward most cut. Now why didn't I cut that section out? I know the core is bad there. Oh well. Shouldn't be to hard to fix. I thought I'd try the drill and bent nail bit. I broke the nail. I moved on to an allen wrench, which I broke. Then got a bigger allen wrench. So much wet core kept coming out that I decided to heck with piddling around like this, and got out my 1 inch hole saw drill bit thingy - whatever it's called. This way, I could really get in there a clean everything out, and then fill the holes with epoxy. No big deal since this whole section of deck will be faired, etc. - someday.

To make this way too long story short, I dug and scraped and gouged, taped the undersides of the holes and filled them. Then mixed more epoxy, laid down 2" tape or 4" tape where needed until my batch ran out, then did it again. I even got out the cloth, the thick mat stuff to fill in low areas where my grinding was at its best. I finished by dark - the whole side deck, everything. Whew!

Friday, August 18, 2006

Vacation Time!

Woo hoo! We're headed out to Chebeague Island for a week of vacation! I don't even know when I last took a real vacation. No work, no house chores, no computer, and (...gulp!) no boat.

I've checked on the deck work numerous times, and it's hardened up real nicely - if not a bit "bumpy", and the deck is nice and firm as it is. But, I suppose I'll need to do some more grinding before the final layers of glass and cloth.

Later.

Tuesday, August 15, 2006

Added Picasa Web Album Link

To document last weekend's festivities, what I really needed was an online photo album instead of all this typing stuff...